Archivo | Recipes RSS feed for this section

Caesar salad: my own version, easy recipe

25 Jul

Since many years ago, Caesar Salad is not longer a local star dish and become international well-known recipe. It is said that it was created by an Italian man resident in Mexico, who gave the name in honor to Caesar Cardini, the restaurant´s owner where he used to work. Alex Cardini, same Caesar´s surname, maybe his brother, later traveled to Tijuana, in order to participate in a gastronomy contest and just there he won a prize with his salad, whose little secret was its dressing. They relate it was popular first in California and then it was extended; the truth is that today it has been completely revealed.

Another story claim that the recipe was created by Caesar Cardini himself, who operated restaurants in Mexico and United States as well. There was an occasion when a group of American pilots came to the restaurant asking for a simple salad; the problem was that, without tomatoes or other typical ingredients, Caesar took his mother´s recipe for scarcity times and at the end it was actually a success: the Aviator´s Salad.

Moreover, according to some memories of his daughter Rosa, died in 2003, the recipe was born on July 4th, 1924, when rush depleted the kitchen´s supplies and her father made it with what he had. Also, a number of Cardini’s staff have said that they invented the dish and to complete all the folklore about the Caesar Salad, the chef Julia Child, very well-known in America for having introduced the French cuisine to the public, said that she had eaten a Caesar salad at Cardini’s restaurant when she was a child in the 1920s. The earliest contemporary documentation of Caesar Salad is from a 1946, Los Angeles restaurant menu, twenty years after the 1924 origin stated by the Cardinis. So, no matter which the origin was, the certainty is that we can enjoy it today.

The salad served in the restaurants in those years, no matter its origin, contained Roman lettuce, coddled eggs, croutons, old cheese, vinegar, sugar, olive oil, some English sauce drops and lemon juice. Today I want to share an own version, more or less, with the original flavor of the Caesar Salad dressing.

All rights reserved by Tras La Receta

All rights reserved by Tras La Receta

Ingredients to prepare Caesar Salad (2 persons)

(version with 2 kinds of tomatoes and crabsticks)

 1 chicken breast 
 2 crustless bread slices 
 1 Roman lettuce 
 mix Batavia lettuce 
 50 gr old Parmesan cheese flakes (or your favorite old cheese) 
 1/2 julienne chive 
 4 diced crabsticks 
 1 red tomato cut into half moons 
 4 cherry tomatoes cut into 4 parts 
1/2 sweet corn can 
2 little anchovy fillets 
1/2 cup wine 
2 tbsp olive oil 
black pepper 
salt

Caesar Salad dressing:

70 ml olive oil

1 tbsp lemon juice

1 large egg

1/2 garlic clove

1 tbsp mustard

1 tbsp English sauce Lea & Perrins (optional)

2 little anchovy fillets

How to prepare Caesar Salad

  1. Cut the chicken breast into little strips. Seasoning with salt and black pepper to taste, add the wine, cover them and keep the recipient into the fridge whereas we prepare the other ingredients.
  2. Heat 2 tbsp olive oil into a pan and fry the bread until golden in order to get our homemade croutons.
  3. Into the same pan heat more olive if it is necessary and cook the chicken breast strips (keep aside the wine). When the strips are cook incorporate the wine we put aside, up the heat, leave the wine evaporates, stir and you´ll see how the chicken golden. Take them and put aside before they drying or they burn. Now let´s prepare the dressing.
  4. Put all the correspondent ingredients of the Caesar dressing into a glass beater. Do not add salt because the anchovies already have. With the beater arm firm on the glass bottom, start beating and do not move the arm until it has emulsified, then you can stir and to finish integrating all the ingredients. The result is a fairly light sauce without becoming liquid. If you prefer it thicker, add an egg yolk (they´ll be two then) and you´ll get a kind of mayonnaise with all Caesar´s dressing flavor. Keep it aside until the Salad is serve.
  5. Into a salad bowl put the lettuce, the tomatoes, the crabsticks, the corn, the chive and one of the anchovy fillets finely cut (keep the other one to decorate). Mix all very well. Serve two individual dishes, add the chicken and cheese. Incorporate some dressing, add the croutons in the very last moment in order to do not wheat the bread and they still crunchy. Fill a sauceboat with extra sauce and put it on the dining table.

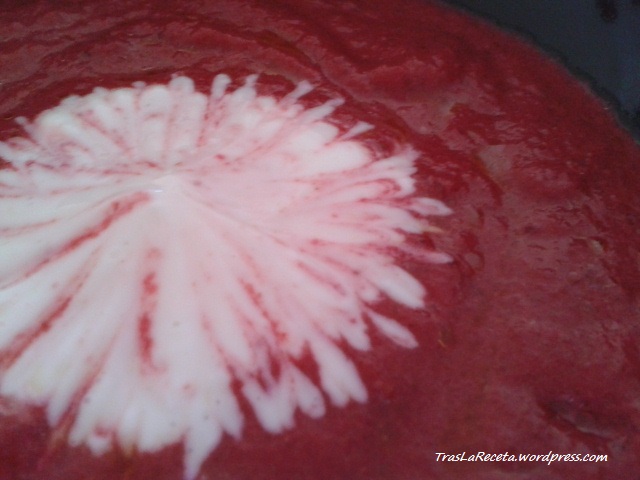
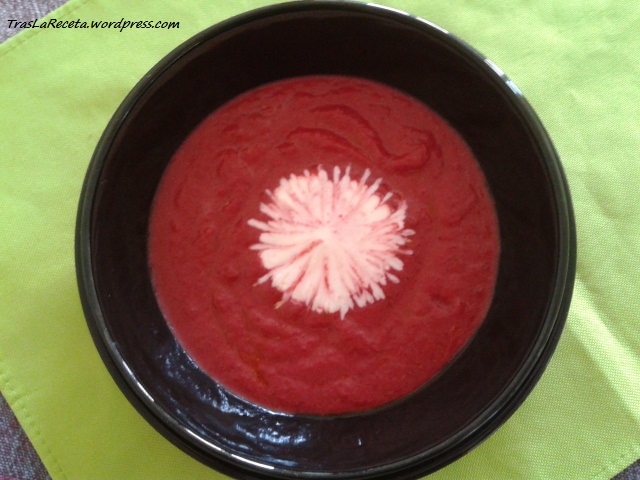
Ready! Enjoy this salad and add it your favorite ingredient. While I prepare another fresh summer salad, stay around here and take a look to this Cold beet soup.

Cold beet soup: light recipe

23 Jul

The hottest summer´s month bring with them, besides the necessity of having fresh and lighter lunches and dinners, wishes of less permanency inside our kitchens. Because of this today I want to share a recipe that will let you spend just a few minutes of preparation and a lot of free time to enjoy it. It´s a recipe that I invented after reading a proposal from Azafrán y Pimentón, blog that I follow, where you´ll find delicious starters or main courses.

This cold soup takes less bread and oil for those who are following any diet, either weight loss or weight control, the beet is an excellent ally if you are under any of these plans. Besides satiates and contains lot of fiber that avoid constipation and favor intestinal transit, beets avoid liquid retentions as well. It´s figured out that people who frequently eat beet have less probabilities of developing some malign tumors, especially if beets are consumed raw. Also they have antioxidants proprieties that become bees natural producers of cells and red bloods, thanks to their high levels of iron and folic acid.

If we introduce beets into our diets, our health in general will improve, and ours skin, hair and nails will take more vitality and shine. This is because of the methionine, an amino-acid present in this food that favors the secretion of hormones like the dopamine, who has the function that we live in a better mood, and if we are in strict plans that we can take them to a happily ending.

To counteract possible damages to people who are week kidneys, I opted for a cook beets. I mix them with a beaten fresh cheese, enriched with calcium, that neutralize the oxalates, agents so prejudicial to kidney diseases or gout. It is advisable the moderate consume of beet to these pacients, but they can take it if is accompanied of products rich in calcium.

One last point: Hypertensive people also should have special care eating frequently beet. This edible root is very rich in sodium, if it´s true has high levels of potassium that use to neutralize the extra amounts of sodium. As I always say, taking one food or another won´t  hurt us, on the contrary, a varied and balanced diet will provide us with more nutrients to supply all the requirements of our organism, and we´ll be able to live more healthy.

Todos los derechos reservados por Tras La Receta

All rights reserved by Tras La Receta

Ingredients to prepare Cold beet soup (4 persons)

450 gr cook beets

1/2 cup (100 ml) tomato juice

120 gr beaten fresh cheese 

2 slices whole-meal bread

1 clove garlic (to taste)

2 tbsp olive oil

salt

Todos los derechos reservados por Tras La Receta

All rights reserved by Tras La Receta

How to prepare Cold beet soup

  1.  Soak the bread with tomato juice y and oil.
  2. Cut the cook beets into cubes and add them to the wheat bread.
  3. Add the garlic and a pinch of salt. Ground in a blender  until the ingredients have integrated. Check the salt to taste.
  4. Incorporate the half of the fresh cheese, blend again. Save it on the fridge. Is has to be very cold when you serve it.

    Todos los derechos reservados por Tras La Receta

    All rights reserved by Tras La Receta

Serve in bowls and add the other half of the fresh cheese. I have to clarify that the result is rather thick, even if the name soup could seem the opposite. If you like  could soups or creams, you will love this. It is very easy to make as you will have seen.  It´s an excellent option to the hot summer nights. I hope you enjoy it as much as I did.

Would you like to see another cold soup? Then visit this link.

Stuffed potatoes: the Cuban recipe, step by step

19 Jul

Today I want to  share a Cuban recipe, a classic on our mom’s menus, made of potatoes and mincemeat. I used to help my grandmother when she prepared them, no matter if the result were a little bit different of their perfectly round balls. I always insisted to eat the stuffed potatoes were prepared by myself, and I would enjoy so much elaborating them and later eaten them. I only participated at the moment of forming the balls, during the rest of the process I only used to watch and ask.

Todos los derechos reservados por Tras La Receta

Todos los derechos reservados por Tras La Receta

Ingredients to prepare Stuffed potatoes: the Cuban recipe (4 persons)

 5 potatoes

40 g butter (optional)

2  beaten eggs

bread crumbs for breading

250 g mincemeat

1 onion

4 crushed garlic cloves

1/2 red bell pepper

1/2 tsp dry oregano

1/2 tsp dry thyme

4 filled tbsp fry tomato sauce

2 tbsp oil

salt

black pepper

How to prepare Stuffed potatoes: the Cuban recipe

  1. Season the mincemeat with salt and black pepper to taste. Mix it with the crushed garlic, the oregano and the thyme.
  2. Heat the oil, add the onion and the red bell pepper, both finally chopped, leave them for a few minutes.
  3. Once the onion transparences incorporate the meat until it golden, then add the tomato sauce (you can use natural crushed tomato). Stir very well in order to integrate every ingredient with the mincemeat and let it cook for 8-10 minutes. Cook the meat with a cover if it is dry, if it has lot of liquid cook it without the cover.
  4. When the mincemeat has cooked, take it out into another recipient and put aside while we prepare the potatoes puree.

Keep in mind the stuffing should be more solid than in other preparations, because here the matter is make our work easier when we form the balls.

Let´s work our potato balls

  1. Cook the potatoes in boiling water with salt to taste for 10 minutes, depending on how large or small you have cut the potatoes.
  2. Make puree, add butter or not, check the salt and let it refresh no cool.

    All rights reserved by Tras La Receta

    All rights reserved by Tras La Receta

  3. Then, with help of a large spoon take first a portion, enough to form a ball, sculpt so that you make a hole in the centre in order to fill with a small spoon of our mincemeat.

    All rights reserved by Tras La Receta

    All rights reserved by Tras La Receta

  4. With the other hand take a smaller portion of puree, form a round layer and cover the filled ball, keep molding until you get a round ball, but don´t worry if it isn´t perfectly round at first time. Later it´ll catch a better form.
    All rights reserved by Tras La Receta

    All rights reserved by Tras La Receta

    All rights reserved by Tras La Receta

    All rights reserved by Tras La Receta

    All rights reserved by Tras La Receta

    All rights reserved by Tras La Receta


  5. When you have finished all the balls the puree has permitted to form (8-12), it is the moment to breading them: pass them first for the beaten egg with a pinch of salt and then for the breadcrumb . It is in this part of the process when you´ll see how your balls end taking the right form without bigger complications.
    All rights reserved by Tras La Receta

    All rights reserved by Tras La Receta

    All rights reserved by Tras La Receta

    All rights reserved by Tras La Receta

    All rights reserved by Tras La Receta

    All rights reserved by Tras La Receta

  6. Put them into the fridge at least for 10 minutes while you prepare a salad or any other accompaniment you prefer.
  7. Fry the potatoes in abundant oil (wait the oil heat very well in order to avoid the balls break). Once they golden turn around, let golden again and take them out.

    All rights reserved by Tras La Receta

    All rights reserved by Tras La Receta

Serve them with a salad of Roman lettuce, cucumber, tomatoes and red onion seasoned with a sweet mustard vinaigrette. It´s very easy: 2 1/2 tbsp mustard, 2 tsp honey, a trickle of Jerez Vinegar, 1 tsp extra virgin olive oil, a pinch of salt and pepper, all very well mixed until the ingredients blended.

If you decide to try this recipe, it´ll be better you do it in advance. You can prepare the mincemeat while you prepare the puree. Remember let the puree refresh but not completely cool. With respect to the breading, if the bread is very thin, sometimes it is necessary to repeat the breading, so later they will fry better and you’ll avoid they absorb more fat, even if this could seen paradoxical. And no more for today: prepare soon this recipe and tell me then. Happy weekend! 🙂

Grated hake sandwiches with duchess potatoes

16 Jul

It is true that duchess potatoes combines better with meats, but today I present them as accompaniment of hake, stuffed with ham and cheese, and grated with toast almonds. This was the menu ideated specially for a little guest, who, supposedly, only ate potatoes and fish, if they were fried.

Although I never throw aside the option of fried potatoes and fish, I took a chance cooking something different that attract attention of my picky eater. At the end, I had not to appeal to her prefer option and my guest, as well as being an enthusiastic and disciplined kitchen assistant, she gifted me with a completely empty dish. So, if you have at home some picky eater, put them this combined dish and invite them to participate in its elaboration. I´m sure they´ll be happy to become chefs.

It is a very easy recipe. The duchess potatoes are a different and delicious way to prepare potatoes. They are an item of the French cuisine and, as I mentioned at beginning, they are the perfect match for meats in general. The grated hake sandwiches, so I called them trying decide the right denomination, they are actually delicious, and quick and easy to prepare them. So, now we know the success they´ve had, I encourage you to make them at home, for delightful of children and adults too, of course. Let´s go, once more, to prepare two recipes in just one.

Todos los derechos reservados por Tras La Receta

All rights reserved by Tras La Receta

Ingredients for Duchess potatoes (4 persons)

4-6 potatoes (depending of the size)
50 gr salted butter
40 gr grated cheese (your favorite)
2 egg yolks
water (to cook the potatoes)
black pepper
salt

How to prepare Duchess potatoes

  1. Peel the potatoes and cut them into cubes (depending of their size they will cook first or later), put them into sated water for 8 to 10 minutes. Do not let they soften too much.
  2. When they´ve already cooked, take them out of the water, drain them very well and start smashing the potatoes. When you got the half smashed, add the half of the butter, the half of the cheese and one egg yolk, mix as well as you can, keep adding potatoes and smashing it until you have made your mashed potatoes; add, finally, the other halves of butter and cheese, check the salt and if you want put a pinch of pepper.

    Todos los derechos reservados por Tras La Receta

    All rights reserved by Tras La Receta

  3. It is time of hand work (here you can call your little assistant). Take a pastry bag with a star nozzle (you can make it with a clean plastic bag cutting it in one of their ends with two cross cuts). Take a baking try, cover it with baking paper. Fill the pastry bag and form little roses pressing little by little.

    Todos los derechos reservados por Tras La Receta

    All rights reserved by Tras La Receta

  4. Once, you´ve finished with the little duchess, paint them with the other egg yolk. Introduce the baking try into the preheated oven (200 Celsius degree) for just a few minutes, until they golden. Do not leave them too much time in order to avoid they drying out. Take them out from the oven and put aside while we prepare our hakes in the blink of an eye.

    Todos los derechos reservados por Tras La Receta

    All rights reserved by Tras La Receta

Todos los derechos reservados por Tras La Receta

All rights reserved by Tras La Receta

Ingredients for Grated hake sandwiches (2 persons)

6 hake fillet
4 ham slices
4 cheese slices
2 filled tbsp grated cheese
1 handful crashed toast almonds
black pepper
salt
oil or butter (to cover a dish baking)

How to prepare Grated hake sandwiches

  1. First, dry very well the hake fillets, especially if they were frozen. Season them to taste.
  2. Put a few oil drops into a nonstick pan if were necessary. Heat it and seal every hake fillet, just instants per side (round and round). You might know that any fish fillet cook fast, and as you already know we going to grated, so it is necessary do not dry them too much; then they´ll be juicier and tastier later.
  3. Paint with oil or butter the bottom of a baking dish. Now put a first layer of hake fillet, a second and third layer of ham and cheese, a fourth layer hake fillet, fifth and sixth ham and cheese again and a last layer of hake fillet. Now sprinkle, first with one tbsp of grated cheese and later with crashed toast almonds. Proceed as well with a second grated hake sandwich.
  4. Put into preheated oven (grill option 220-250 Celsius degree) for 3-5 minutes or until cheese melted and golden. Take them out immediately and serve with our duchess potatoes.
    Todos los derechos reservados por Tras La Receta

    All rights reserved by Tras La Receta

    Todos los derechos reservados por Tras La Receta

    All rights reserved by Tras La Receta

This is all, now enjoy this combined dish as we did sat to the kitchen table.

Todos los derechos reservados por Tras La Receta

All rights reserved by Tras La Receta

Would you like try another potato’s recipe? Then click Tambor de papas.

Cherries Salmorejo

11 Jul

If you liked Cordovan Salmorejo, then you´ll love this cherries salmorejo, whose recipe I came across surfing Internet. At this time, the recipe for gourmets is presented by Directo al Paladar. All the credit is for them. Perhaps, I hasn´t got the spectacular color of the original recipe (you´ll check this if you click the previous link) but the flavor is gorgeous, an amazing explosion for our taste.

Todos los derechos reservados por Tras La Receta

All rights reserved by Tras La Receta

Ingredients:

650 gr red ripe tomatoes
350 gr cherries
200 gr bread (day before)
1 garlic clove (I prefer just 1/2 one)
150 ml (3/4 cup) extra virgin olive oil
water to scald the tomatoes
salt

Todos los derechos reservados por Tras La Receta

All rights reserved by Tras La Receta

How to prepare Cherries Salmorejo

  1. Scald the tomatoes and leaves them ready to use. Click here and you´ll be able to see how easily we can do it.
  2. Remove the bone of every cherry. You can do it with a special tool or you can try with your own hands (it´ll be very easy if you use ripe cherries).
  3. Put the bread, the tomatoes, the cherries, the olive oil, the garlic and the salt into a container or into a blender vase. Blend as well as be possible. It won´t be necessary pass it through a Chinese strainer, but you can do it if you want.
  4. Leave the Cherries Salmorejo inside the fridge while you prepare a hard-boiled egg.

Just as we can do it with Cordovan Salmorejo, take it as an appetizer, as a menu starter or even as a light dinner substitute. Serve cold and garnish with diced hard-boiled egg and diced serrano ham.

Yummy, yummy!!

Salmorejo: Cordovan recipe

10 Jul

Last summer I made my first Cordovan Salmorejo (Salmorejo cordobés) thanks to the great explanation I found at Javirecetas website. I loved that simple but delicious dish that hereinafter appeased hot, thirst and hunger. This season, as soon as barely heat was felt, I went to buy some good red tomatoes in order to prepare the first Salmorejo of the summer. Now, pear tomatoes and tomatoes branch are in their very best moment.

The branch tomatoes are my favorites to prepare Salmorejo. I leave the pear tomatoes for our Andalusian breakfasts that we have every weekend, summer or winter, no matter which season be. The Cordovian Salmorejo is a very humble dish. It used to be prepared before Christopher Columbus brings tomatoes here from the New World. Because of this reason, before that, the Salmorejo used to be made just with vinegar, bread, oil and garlic, all perfectly crushed on a mortar. It was never on a court cook book. It was prepared and eaten by poor people and countryside people.

There are two crucial moments for Salmorejo as we know it today. When tomato is introduced and the Salmorejo takes the red color (before that it´s used to be a white cream or soup), and a second moment it was when the electric blender was invented. It replaced the anterior primitive process. Historical references claim that Romans and Arabians, each of them, made and consumed the white primitive Salmorejo, hot or cold. Today the identified recipe as Cordovan Salmorejo is a little bit different, but tasty, fresh and extended for all the Spanish geography.

Todos los derechos reservados por Tras La Receta

All rights reserved by Tras La Receta

Ingredients to prepare Salmorejo Cordobés (Javi´s recipe for 2-4 persons)

500 gr red ripe tomatoes
100 gr bread (day before)
1 garlic clove (I prefer just 1/2 one)
100 ml (1/2 cup) extra virgin olive oil
water to scald the tomatoes
salt

How to prepare Cordovan Salmorejo

  1. Scald the tomatoes and leave them ready to use. Click here and you´ll be able to see how easily we can do it.
  2. Put the bread, the tomatoes, the olive oil, the garlic and the salt into a container or into a blender vase. Blend as well as be possible. It won´t be necessary pass it through a Chinese strainer, but you can do it if you want.
  3. Leave the Salmorejo inside the fridge while you prepare a hard-boiled egg.

Take it as an appetizer, as a menu starter or even as a light dinner substitute. Serve cold and garnish with diced hard-boiled egg and diced serrano ham.

Yummy, yummy!!

Ham and spinach risotto: Italian recipe

6 Jul

As I recently promised, here I come with a risotto, whose recipe I came across dusting my little library. The rice is one of the feedings that I cook more often, and for this reason I try to eating it in many different ways. It´s the heritage from Cuba, where there is not one day when it doesn´t eat rice. The proposal that I present today tries to follow my book´s recipe, but as always, you´ll find here my personal touch.

And as always too, here you have some notes of the risotto, whose Italian nature it isn´t unknown. Originative from northwest of this nearby country, specifically from the East of Piamonte, West of Lombardía and Verona, places plenty of rice, the risotto is a pillar in the north gastronomy. The clear future of this Italian dish is the cheese, generally Parmesan, and a high quality rice variety, round-medium to small grain white rice, with less amylose, that makes possible when it liberates more starch, a creamiest and tastiest rice.

Although I didn´t use none of the varieties that more frequently are used in Italy for the risotto, here I mention some of the most popular. They’re Arborio, Baldo, Carnaroli, Maratelli, Padano, Roma y Vialone Nano. The best and most expensive varieties are Carnaroli, Maratelli y Vialone Nano, with little differences between them. The Carnaroli, for example, is less likely than Vialone Nano to get overcooked, but the Vialone Nano, being smaller, cooks faster and absorbs condiments better. The matter is that you can choose a round rice, just like some we have here in Spain. If you follow my tips you’ll get a risotto with the authentic taste.

Todos los derechos reservados por Tras La Receta

Todos los derechos reservados por Tras La Receta

This is the English version for Risotto de Jamón Cocido con espinacas that you can read here.

Ingredients to prepare Ham and Spinach risotto

4 cup boiling chicken broth (you can dissolve 2 tablets in the same measure of boiling water)
225 gr fresh spinach
120 gr ham
1 tbsp olive oil
3 tbsp butter
1 chive finally chopped
280 gr white round rice
3/4 cup dry white wine
1/2 cup evaporated milk or cream
85 gr grated Parmesan cheese
1 tbsp finally chopped peppermint
salt and pepper

How to prepare Ham and spinach risotto

  1. Cut finally the chive. Wash and cut the spinach julienned and cut the jam into strips. Reserve all.
  2. In a thick base pan heat the olive oil with 2 of the three butter tablespoons until it be completely melted.
  3. Add the chive y salt to taste if the butter hadn´t salt. Sauté until the chive starts to change its color. Care not to burn.
  4. Down heat, add the rice and stir in order to mix with the butter and the chive. Leave just a couple of minutes and just when the grains be transparent add the wine and leave it until it has evaporated.
  5. Now it comes the moment when you have to add the chicken broth, ladle by ladle. Low the heat just a bit in order to the liquid burble.
  6. Leave it cook for 15 to 20 minutes depending on the strength of the rice or until the broth has been absorbed.
  7. A few minutes before finishing the cook add the spinach and the ham we had cut and set aside.
  8. After the cook time has finished incorporate the rest of the butter and evaporated milk or cream. Stir, add the cheese and the peppermint, and stir again.
  9. Put salt y pepper to taste y dish it up right away.

    Todos los derechos reservados por Tras La Receta

    Todos los derechos reservados por Tras La Receta

If you like exotic flavors click here and learn how to cook a delicious Rice with pistachios and dates.

Peppa Pig birthday cake

26 Jun

Last Sunday we celebrated the birthday of a friend´s little boy. Alejandro, this is his name, loves cartoons and recently he watch attentively to Peppa Pig´s new programme, where a family of pigs and their adventures entertain the children as well as did too other popular characters as Pocoyo or Bob Esponja.

Todos los derechos reservados por Tras La Receta

Todos los derechos reservados por Tras La Receta

Todos los derechos reservados por Tras La Receta

Todos los derechos reservados por Tras La Receta

Before Alejandro´s mom talked me about these lovely little pigs, I didn´t know them. I knew that my birthday present for Alejandro would be a cake, so I searched about this cartoon character on Internet and decided to decorate the cake with the adorable pigs. As expected, Alejandro loved it, so much that he took a seat just in front of the table, with the hope that they gave him a slice of cake 🙂

Todos los derechos reservados por Tras La Receta

Todos los derechos reservados por Tras La Receta

I prepared a cookies and chocolate cream biscuit that I found at Ana Obregon´s Cupcake Maniacs. You can watch it here. Just a clarification: I added chocolate to the filling cream and covered it with a vanilla butter cream that I colored with some blue food coloring. It turned into light green because the butter cream is pale yellow, so when we mix blue and yellow the result can´t be other. I knew that, so it wasn´t a surprise.

Todos los derechos reservados por Tras La Receta

Todos los derechos reservados por Tras La Receta

I´d wished to take a better picture from the cake cutting but they didn´t give me much time. It was delicious!  😉

Volver

Se ha enviado tu mensaje

Advertencia
Advertencia
Advertencia
Advertencia

¡Aviso!

Oreo Cheesecake, non bake easy recipe

23 Jun

In the summer we prefer fresh desserts, easy to prepare them and better if you don´t have to turn on the oven. Since a time ago, I had an idea turning around my head, and visiting a few blogs and other websites, where you can find delicious recipes, I finally decided for a recipe that mixed cookies and cheese cream, very close from one that I shared here a few months ago. It was Blueberry Cheescake. Just a little change: this time I used Oreo cookies and the result couldn´t be other.

Todos los derechos reservados por Tras La Receta

Todos los derechos reservados por Tras La Receta

Ingredients:

  • 400 g Philadelphia cheese cream
  • 300 ml milk cream (1 1/4 cup)
  • 156 g Oreo cookies
  • 40 g butter
  • 4 leaves of neutral jelly + 1 cup water
  • 50 g white sugar
  • 2 ó 3 tsp water

How to prepare our Oreo Cheesecake

When you opened your cookies packet reserve four of them. With the other cookies you must open every one and to take off the cream. Keep it for later. Crushed the cookies.

  • Now add the butter completely melted and mix it with the crushed cookies. Work as well as you can this mix. Distribute a 1 cm layer in a tart pan, better if it is removable. Save it on the refrigerator while you move on with our recipe
  • Fill a bowl with cold water and put the leaves of neutral jelly for 8-10 minutos.
  • Heat softly the cream with the sugar, the cheese and the cookies cream until it boils. It will help you using a whisk.
  • When it boils remove form the fire, add the hydrated jelly leaves and blend it until all be integrated. Let it refresh. Fill the tart pan, take two of the four cookies that we save, chop it and put carefully the pieces into the mix.
  • Crown with one cookie in the middle and grate the last one over our cheesecake. Save once more on the fridge and let it there 6 hours at least.
    Todos los derechos reservados por Tras La Receta

    Todos los derechos reservados por Tras La Receta

    Todos los derechos reservados por Tras La Receta

    Todos los derechos reservados por Tras La Receta

    Enjoy this fresh dessert as I did. Soon I will share all my old posts in English, but it´ll be little by little; and please if you see any mistake don´t doubt make me know, it is the only way to improve and make me understand as well as in my native language. Be patients and be happy too.


Turkey´s sirloins with apple sauce

3 Abr

One of the most lean meats, ideal to maintains our average weight, it’s turkey meat. We usually consume it just in specials occasions, but the truth is that it´s available at any supermarket in any season. There are more and more people, lately, who prefer one turkey ham before another ham. It´s a very tasty white meat, another option to balance our diet and don´t get boring eating always the same things.

An oven-roasted turkey always is delicious, but this time we´re gonna prepare the sirloin: an extraordinary lean meat no bones piece. One person can eat a whole turkey sirloin, because of this today we´re gonna need two turkey sirloins that we let them a couple of hours marinating in the fridge. If you decide let them the night before they will be even better and if you want another sirloin recipe, a pork sirloin, click here.

Todos los derechos reservados por Tras La Receta

Todos los derechos reservados por Tras La Receta

Ingredients for Turkey´s sirloin with apple sauce

  • 2 turkey sirloins
  • 1 apple (golden apple)
  • 1 leek
  • 1 carrot
  • 1 chive
  • 3 garlic cloves + 4 more for our marinating
  • 1 1/3 cup white wine
  • 1 cup chicken broth
  • 1 lemon
  • 3 tbsp extra virgin olive oil
  • black pepper and salt

How to prepare Turkey´s sirloin with apple sauce

  1. Crash in a mortar four garlic cloves, a pinch of salt and black pepper. Add lemon juice plus 1/2 cup of wine and mix all very well. Put together this preparing and the sirloins, check the salt and if you have a syringe catch some of the marinating and put it inside the sirloin meat. Cover the recipient where you put the meat and leave it on the fridge two hours at least or, as I said at the beginning of this post, leave the meat prepared the night before.
  2. Cut our ingredients: leek, carrot, chive and garlic into not too small pieces. Remove the skin and the heart of the apple y cut it into dices.
  3. In a deep pan heat the oil and when it is warm enough put the sirloins, drained, in order to not burning you. Here the objective is to brown the meat as soon as be possible to avoid it lose their interior juices and give it some golden color. Once you got it, bring them out and set aside.
  4. Into the same pan but down heat put the garlic, the chive, the leek and the carrot. With a wooden spoon mix all and scrape the pan bottom in order to release all flavors that the meat could leave.
  5. Now add the apple, blend, leave a couple of minutes and incorporate the rest of the wine we had. Leave the alcohol evaporate and reduces it, add then the chicken broth and check the salt (you can use a bouillon tablet but take care about the salt extent).
  6. Now put again the sirloins into the pan with the sauce we made and let them cook for 15 minutes covered. When the time has passed check the sauce had thickened. Whether haven’t made it let reduces it.
  7. If you like sauces with little pieces, leaves it as well, but if you decide prepare it as I did in this recipe, bring the sirloins out and set aside and put the sauce into a beater and done. Cut the sirloins into slices and serve them with the apple sauce.

I enjoy this recipe with mushrooms sautéed with garlic and parsley. So simple as saut the mushrooms into a couple of olive oil tablespoon and sliced garlic with fresh parsley and salt. A delicious light starter, perfect to join to our turkey sirloins.

All a world behind one recipe

23 Nov

Detrás de la receta

Since I was a child I´ve seen the kitchen as a multi-faceted place. To my grandma and my mom I owe this feeling. Thanks them I always found in this site, not only feeding, also the awakening of the curiosity, the pleasure of create an idea, shares it, offers it, realize it.

Along the wishes to conquering my own seasoning were growing up, I found the same enjoyment at reading and writing. If I say that thenceforth I started «to cook» the idea of this blog, I wouldn´t be honest, because when we are teenagers, at least when I was it, our interests are actually a lot and different between them; although, the seed always was there.

In those times I used to cook by an impulse, just an anxiety and not an obligation. They hadn´t let me do anything if first I hadn´t carried out which was my duty then: study, study. But today, when I get into the kitchen every day, I still doing it encouraged by some secret engine that all cook lover knows very well.

I love improvising, mixing flavors, making variations. It makes me happy the success of any dish, one or two failures don´t make me give up because I always have a second chance. I say with this that I´m not a foolproof cook, whether a cook that is very happy cooking for others.

detrás de este blog

Well, and now whether that I present my blog, a place that wants share my favorite recipes. All of them cooked with a lot of love and on my own way because they don´t pretend at all being the absolute recipe: I let this matter in hands to more consecrated people in the field.

With this little extension of my kitchen, I want to let an opened window to the smell of my seasoning, but to the seasoning from other kitchens too. And as the curiosity still being to me an inseparable characteristic of my personality, you can easily find here the huge world behind a recipe: their stories, their roots and the quality and particularities of some of their ingredients.

Rice with chicken: recipe for electric rice cooker

2 Nov Arroz con Pollo

Today I wanna share a rice with chicken easy recipe that my grandmother used to prepare very often.  The reasons, beyond the economic, they used to answer to the pleasure of seating us at the eating table to enjoy this simple but delicious dish.  We usually ate it with an onion rings and tomatoes salad, and «tostones«. This last recipe you can see it at HERE.

With a whole middle chicken or a half of a bigger one, my grandma prepared a tasty broth (the base of our rice), a noodle soup and, if the meat reached, we could enjoy, as well,  an «aporreado», that was no more than crumbled chicken with tomato sauce.

This time, with a half of a chicken I prepared a rich consommé that we will use to cook this recipe.

Arroz con Pollo

Rice with chicken (4 people)

Ingredients for chicken broth:

  • 1 chicken
  • 6 cups of water
  • 2  garlic cloves
  • 1 onion
  • 1 leek
  • 1 carrot
  • 2 potatoes
  • cilantro and fresh parsley (to your taste)
  • 1/2 tsp sweet cayenne
  • 1/2 tsp cumin
  • 1 bay leave

Ingredients for rice with chicken

  • crumbled chicken from the broth
  • 2 cups round white rice
  • 3 cups chicken broth
  • 1/2 cup of beer (lager)
  • 1/3 cup olive oil (preferentialy extra virgin olive oil)
  • 150 ml tomato sauce
  • 3 garlic cloves
  • 1 onion
  • 1/2 red pepper
  • 1 bay leave
  • 1 can sweet corn
  •  salt and pepper

How to prepare chicken broth

  1. Add to a stewpan or pressure cooker the water with the onion, the garlic, the bay, the sweet cayenne, the cilantro, the carrot, the potatoes and the leek.  Cut the leek en three parts, scrape the carrot and peel the potatoes.
  2. Cut the chicken into pieces, add them salt and pepper, and cook them with an oil splash until the chicken browned. Then pass the chicken to the pressure cooker, put the top and the heat low until it takes pressure, now you must reduce it and count 10 minutes. Then, put it down, let the pressure be released. Take the chicken, keep it, and leave the broth be cool. It´s very important when you cook into a rice cooker to use cold water or whatever liquid yo use it, let it be cool, whether the the rice cooker ends the cook before our rice be  completely done. All the ingredient should be, preferentely, al room temperature. If you can´t prepare the consommé or broth before, then you should, at least, temper it after you make it.
  3. Now crumble the chicken and let it free of bones, but if you prefer you can make the rice with the entire pieces.

Cómo preparar el arroz con pollo

  1. It´s ready the cicken so come back to the broth that should be cool and use 3 cups of them.
  2. Crush 3 garlic cloves into a mortar with salt and pepper. Cut into small dice the red pepper and the oinion. Put all into a pan and still-fry. Add the chicken, the round rice and tomato sauce, mix during 1 minute and remove from the fire.
  3. In the last step, put the chicken broth and the lager into the electric rice cooker, check the salt and turn it on.
  4. When the rice cooker ends, unplug it, add the sweet corn and a cold water splash, and let the rice reposing during 10 minutes. After that stir the rise and served it. You can enjoy more this recipe with tostones that yo can find here.

If you have not a rice cooker you can also cook this recipe at a thick bottom wide pan. Just let the rice for 20 minutes, low heat, until the rice absorbs all the liquid. The procedure after that it is the same: sweet corn, 10 minutes reposing, stir and have a great lunch or dinner 😉


El blog de la alimentación y cuidados naturales

Intercambio de información e ideas sobre una alimentación y cuidados personales respetuosos de nuestro cuerpo y nuestra mente.

Luis Perrone Chef

La cocina de Perrone Luis

sarde e finocchietto

le ricette di casa mia

COMIÉNDOSE EL TIEMPO

Afila tus cuchillos

El Caldero Viajero

Come bien. Viaja a menudo.

Consejo Nutricional

La salud a través de la alimentación y nutrición

Jono & Jules do food & wine

Two food and wine lovers in Dublin.

Comer es Vivir

"Que el alimento sea tu mejor medicina y tu mejor medicina sea tu alimento"

La cocina de ama

blog de comida casera

dulcedelimón

Recetas caseras para sorprender